The short answer
The Sur-Ron Light Bee X is the most-built bike in the class because the aftermarket is deep — but the order you build in matters more than the parts you pick. The house rule:
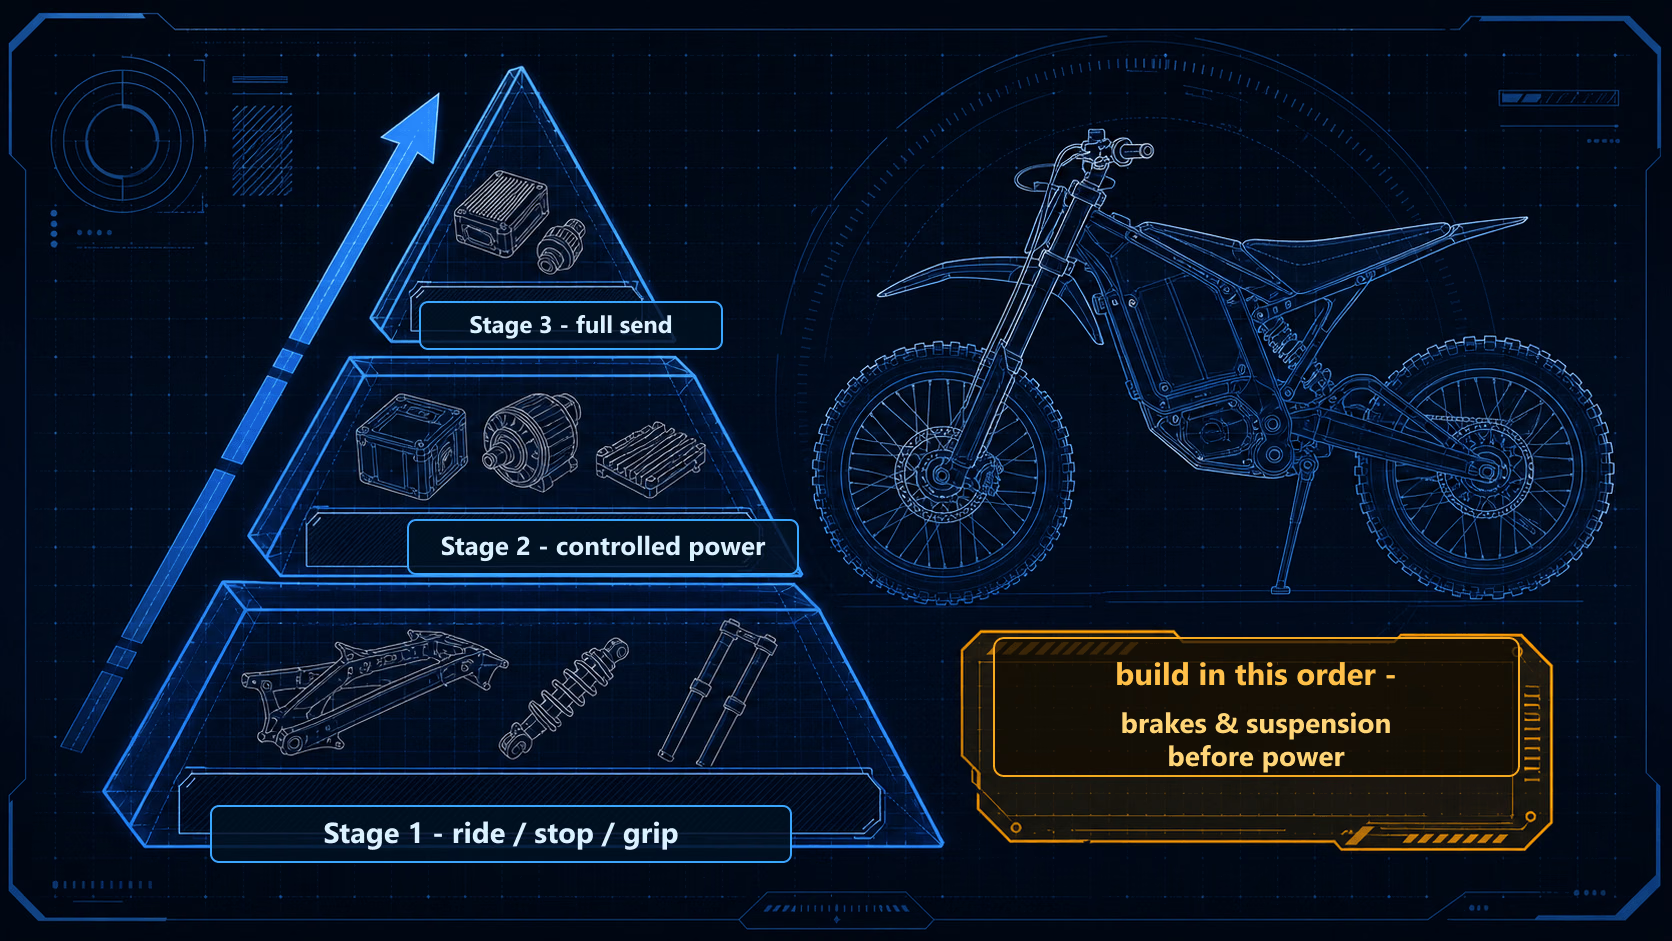
> Stage 1 — ride, stop, grip, fit. No added power. > Stage 2 — controlled power, and the battery to feed it. > Stage 3 — the full send.
Build in that order and you get a better, safer bike at every step. Skip to power first and you've built a fast bike you can't stop. For a lot of riders, Stage 1 is the whole build — and that's a feature, not a shortcut.
Stage 1: ride, stop, grip, fit — do this first
The stock Light Bee X has soft suspension, small bicycle-grade brakes, and a one-size ergonomic setup. These are the limits every rider hits first, and fixing them helps everyone — unlike power, which only helps riders skilled enough to use it.
Suspension. The stock fork is the number-one weak point — dive, deflection, and harshness. A fork upgrade transforms how the bike rides at any speed.
Brakes. The cheapest high-value change on the whole bike: a bigger front rotor with an adapter adds real stopping power and heat capacity, often while keeping your stock caliper.
Add better pads and braided lines, and for a lot of riders a bigger rotor, good pads, and braided lines are all the brakes they need. The full brake-upgrade guide covers when to step up to a moto kit.
Grip and fit. Terrain-correct tires are the cheapest ride-changer (see tires & wheels), and if you're tall, bars or a seat riser make the bike fit — covered in fit & ergonomics. Keep the chain clean while you're at it.
Stage 1 is the highest-value money on the bike, and it risks nothing — no warranty questions, no heat, no legality change. Many great Light Bee builds stop right here.
Stage 2: add power — properly
Only once the chassis is sorted, and only if you've genuinely outgrown the stock power. A high-power controller is the single biggest "more power" mod — but it leans on the battery and the brakes you (hopefully) already upgraded.
Because a bigger controller pulls harder, it wants a faster charger to keep up with the drain — and, critically, the charger must match your pack's voltage exactly.
The Stage 2 caveats, plainly: the stock 72V pack becomes the limiter and works harder (fine for trail; if you're constantly deep in the throttle, that's a Stage 3 battery). Power mods commonly void warranty and can change a bike's street-legal class. And your brakes must already match your power — that's why Stage 1 comes first. The controller guide has the full detail.
Stage 3: the full send
For racers and experts who use every bit of it. A high-power battery feeds the big controller, holds voltage under load, and adds range — the fix for a bike that "runs out of punch" when ridden hard.
Round it out with a full moto brake kit, race suspension, and a wheelset for the full moto-tire catalog — and if you're building a street/supermoto Light Bee that never jumps, a belt-drive conversion trades chain maintenance for quiet, clean running.
The honest warning: a full Stage 3 build can cost as much as the bike itself. It's easy to double a Light Bee X's price in parts, so build to how you actually ride.
The two rules that keep a build safe
- Chassis before power. Suspension, brakes, and cooling come first or at the same time as power — never after. More power is more speed the stock brakes were never designed to scrub off.
- Voltage must match — or it's a fire. Battery, controller, and charger must all be the same voltage. A mismatched charger on the wrong pack overcharges it, which is a genuine fire risk. Our parts compatibility guide covers why fitment and voltage are non-negotiable.
The bottom line
The best Sur-Ron Light Bee X builds follow the order: ride and stop first, add power second, full send only if you'll use it — and never let braking or voltage-matching lag behind. Start with Stage 1; it's the highest-value money and, for many riders, the whole build. The upgrades guide sets the general order of operations, and maintenance keeps it all running. Not sure the Light Bee X is your bike? Run the Find Your Ride configurator.
VoltRipper is independent — we don't sell parts and our recommendations aren't pay-to-play. Building a faster bike is safety-critical: match braking, suspension, and voltage to any power increase, follow your component manufacturers' fitment and torque instructions, and check your local laws before derestricting. Affiliate disclosure is included on monetized pages, and we're spec-verified/data-driven rather than hands-on until first-hand testing exists.
FAQ
What should I upgrade first on a Sur-Ron Light Bee X?
Suspension, brakes, and grip — before any power. The stock Light Bee X ships with soft suspension and small, bicycle-grade brakes, and those are the limits every rider hits first. A fork upgrade, a bigger brake rotor, better tires, and a fit tweak (bars or seat riser) make the bike better and safer for everyone, and they cost far less than a power mod. Adding power to a bike that can't yet handle or stop well is how people get hurt. Fix the chassis first; that's Stage 1, and for a lot of riders it's the whole build.
Do I need a controller and battery upgrade on a Light Bee X?
Only if you've outgrown the stock power after Stage 1, and only together. A high-power controller (Stage 2) is the single biggest 'more power' mod, but it leans on the battery — run a big controller on the stock pack and you get a fraction of the gain plus a harder-worked battery. Serious power builds pair the controller with a high-power battery and a matching charger (Stage 3). If you just want the bike to handle and stop better, you may never need Stage 2 at all — plenty of great Light Bee builds stop at Stage 1.
How much does it cost to build a Sur-Ron Light Bee X?
Anywhere from a few hundred dollars to more than the bike, depending on how far you go. A Stage 1 chassis build (fork, big rotor, tires, fit) is the highest-value money and lands in the hundreds. A full Stage 3 build — high-power controller, high-power battery, full moto brakes, race suspension, wheels — can add up to as much as the bike itself. That's the honest warning: it's easy to double a Light Bee X's price in parts, so build to how you actually ride rather than chasing every mod.
Is it safe to make a Sur-Ron faster?
Only if you upgrade the brakes, suspension, and cooling to match — and match the voltage of every electrical part exactly. More power gives you speed the stock brakes were never designed to scrub off, so brakes and suspension come first or at the same time, never after. On the electrical side, the battery, controller, and charger must all be the same voltage; a mismatched charger on the wrong pack is a genuine fire risk. Build in that order and derestricting or adding power is reasonable; skip it and you've built a fast bike you can't stop.